


Think about the last time you deep-cleaned your home. You pushed your vacuum back and forth, watching visible dirt disappear from your floors and carpets, and felt a sense of accomplishment. But what about the invisible aftermath? If you’re not regularly maintaining your vacuum filter, you might be unwittingly sabotaging your efforts, allowing dust mites, pollen, pet dander, and other microscopic allergens to circulate right back into the air you breathe. This critical component is the lungs of your cleaning machine, and its condition directly impacts everything from suction power and motor life to your home’s indoor air quality. A clogged or worn-out filter doesn’t just mean a less effective clean—it can turn your vacuum into a pollutant distributor.


This essential guide will walk you through the simple yet vital steps of maintaining your vacuum filter, from identifying your filter type (HEPA, foam, pleated, or cartridge) to mastering the routines of proper cleaning, drying, and timely replacement. Learn how this one habit can extend the lifespan of your appliance, save you money on repairs and energy bills, and most importantly, ensure that every pass of your vacuum genuinely cleans your home, leaving behind nothing but freshness. Let’s give your vacuum—and your home’s health—the care it deserves.

Keeping your vacuum filter clean is essential to ensure optimal performance and longevity of your household appliance. Here’s a simple, step-by-step guide to help you achieve this goal effortlessly. For most bagless models, such as Bissell, maintaining the filter is a routine task that ensures efficient cleaning and helps to absorb those airborne particles effectively. When the filter becomes clogged with accumulated debris, it can cause your vacuum to lose power, making the cleaning process less effective.
The first thing to do is consult your vacuum manufacturer’s instruction manual, as it provides personalised options tailored to your specific model. While some filters can be washed with water, others may require being cleaned with a soft-bristled brush or tweezers to remove tightly stuck particles. Once you have identified the right method, you can extend the life of your vacuum and ensure it cleans as efficiently as possible. Make sure to check your filter regularly for signs of wear or tearing, particularly if you’re a family that walks a lot in and out of your home.
Your cleaning routine should include cleaning the filter every couple of months to avoid performance drops. In just a few minutes, you can spruce up your vacuum’s insides and prevent further issues down the line. By following these simple steps, you’re taking the first step toward maintaining a well-functioning vacuum, ensuring it remains a valuable tool in your cleaning arsenal for years to come.
Step 1: Gather Necessary Tools
Before you start cleaning your vacuum filter, it’s essential to gather the right tools. This step is crucial to ensure that the cleaning process is effective and safe. The primary items you’ll need include a soft-bristled brush, a towel, and a cleaning solution. These tools are designed to work harmoniously with your vacuum, helping to prolong its lifespan.
A soft-bristled brush is perfect for gently tapping away dirt and hair that accumulates on the filter. When cleaning canister filters, you should avoid using anything abrasive that could damage the material. It’s important to handle them with care to prevent any unnecessary wear and tear. Additionally, having a towel handy will help you dry the filter completely after cleaning, which is vital in preventing moisture buildup in your appliance.
If you’re dealing with stubborn grime, a gentle detergent mixed with water can serve as an effective solution. Make sure to use only a small amount to avoid leaving residue that can attract dirt. Regularly checking and maintaining your vacuum filter is key to ensuring optimal performance. This ensures that your appliance works efficiently, reducing energy consumption and extending its overall lifespan.
Remember that your vacuum is one of the most used appliances at home, and giving it the care it deserves will significantly improve its functionality. For those who prefer convenience, consider options like pre-packaged cleaning kits available on sites like Amazon, which include everything you need for filter maintenance. Just search for “vacuum filter cleaning kit” to find some great recommendations!
What Tools Do You Need?
To effectively clean your vacuum filter and ensure optimal performance, you’ll want to gather a few essential tools. Understanding the process can help you keep your vacuum running smoothly, which extends its lifespan. Here’s a step-by-step guide for selecting the appropriate tools.
Firstly, a damp cloth is crucial for wiping down the exterior of the vacuum canister. It helps remove accumulated dirt without scratching the surface. Consider using microfiber cloths, which can be found easily on sites like Amazon. These cloths are effective in lifting dirt and bacteria, keeping your machine as clean as possible.
Next, a toothbrush or similar small brush is invaluable for cleaning the smaller crevices of your vacuum filter. You can use it to shake off any trapped dust and dirt that may have built up over time. The bristles can get into those hard-to-reach areas, ensuring that every part of your filter is addressed.
Additionally, you may want to keep a few canister bags handy. Depending on the type of vacuum you have, such as a Dyson or another model, you should regularly replace these to maintain optimal suction and performance. It’s best to check this regularly; the main rule is, if the bag is more than half full, it’s time to replace it.
Other tools that could come in handy include a small plate for any screws or small parts that might need replacing. Keeping these items organized means you’ll have all the necessary components ready when you need them. Lastly, remember to keep purifiers and other filters cleaned as per the manufacturer’s instructions, as this plays a significant role in your vacuum’s performance.
By incorporating these tools into your cleaning routine, you’ll be well-equipped to tackle the task effectively. Tap that button to start cleaning and watch your vacuum perform better than ever!
Where to Find Replacement Parts?
Finding the right replacement parts for your vacuum cleaner is essential for ensuring optimal performance. Whether you own a bagless model or one with bags, maintaining your appliance is key to prolonging its lifespan. Regular maintenance helps you avoid clogged filters and dirt build-up, which can lead to malfunctioning appliances. Luckily, there are plenty of resources available to help you find specific components.
First and foremost, check the manufacturer’s website for your vacuum cleaner model. Most brands offer detailed lists of replacement parts and accessories, which can be vital for effective housekeeping. For instance, if you have a MacDonald model, their official site might provide data on brushes or attachments that specifically fit your cleaner.
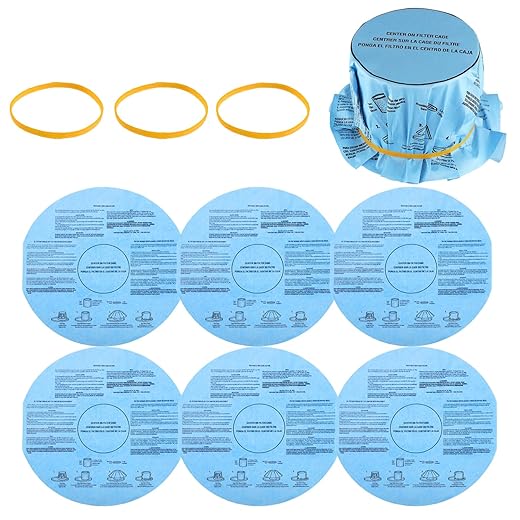
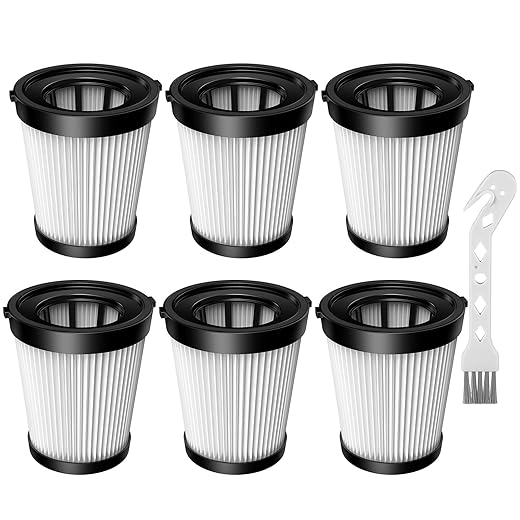
Another excellent option is online marketplaces like Amazon.com. Here, you can find various parts, including filters, brushes, and other attachments. Be sure to read the reviews and look for products compatible with your specific model. For example, you might discover a highly-rated HEPA filter or premium vacuum bags that fit your cleaner perfectly. Here’s a quick table to highlight some useful vacuum cleaner replacement parts you may find:
If you prefer hands-on shopping, local hardware or home improvement stores often carry vacuum cleaner parts as well. Don’t hesitate to ask staff for assistance; they may help you quickly locate the part you need. You can even use tools like tweezers to help with small components when disassembling parts for cleaning.
For those who have pets, it’s crucial to regularly check and replace parts to keep your home environment clean and bacteria-free. Performing regular maintenance, such as removing hair and dirt from brushes and filters, can significantly improve your vacuum’s power. By focusing on proper upkeep, you’ll find that your vacuum cleaner will continue to perform effectively, lengthening its useful life and enhancing the indoor air quality of your home.
Step 2: Disconnect and Access the Filter
To begin cleaning your vacuum filter effectively, the first step is to disconnect your appliance from the power source. Safety is paramount, so never skip this critical step. Take some time to ensure the vacuum is completely turned off and plugged out. This simple action prevents any accidents while you are working.
Once the vacuum is safely unplugged, it’s time to access the filter. Depending on your model, the filter may be located at different levels within the appliance. You may need specific tools, such as a screwdriver, to remove the cover. Browse your user manual for details and ensure you have everything you need on hand. If the filter is stuck, gently shake or tap it to loosen any accumulated dust and debris.
After removing the filter, take a moment to check for any signs of damage or tears. This step helps you identify whether the filter is still effective or needs replacing. If it looks particularly dirty, you can clean it with mild water or sponge. Avoid using harsh cleaners, as they may damage the filter material. Regularly maintaining your vacuum filter can significantly improve its suction and overall performance.
While cleaning, allow the filter to dry completely before reassembling it back into the appliance. This may take a few hours, but it ensures that your vacuum is running at its best. If you decide to go for a disposable filter, make sure to check the options available on platforms like Amazon. Products such as the “HEPA Filter for Various Vacuum Models” or “Reusable Vacuum Filters” can provide different levels of performance based on your cleaning needs.
Remember, maintaining your vacuum filter is a step-by-step process that ensures a fresh and effective cleaning experience every time. By taking these actions, you are helping your vacuum cleaner operate at peak efficiency, making your cleaning time more enjoyable and effective.
How to Safely Disconnect Your Vacuum?
Before you start cleaning or replacing any parts of your vacuum, it’s essential to know how to safely disconnect it. Whether you have a Bissell or Dyson vacuum, following the right instructions ensures that your vacuum remains in good condition for a longer lifespan. Always turn off your vacuum and unplug it from the outlet before doing any maintenance. This step is crucial to prevent accidents or injuries as you work on your machine.
Once you’ve disconnected the vacuum, make sure to empty the canister or replace the bag if you have a bagged model. This process should be done daily or monthly, depending on the frequency of use. Leaving dirt and debris inside can clog essential parts, making cleaning less effective. If you notice any signs of tearing in the canisters or bags, replace them immediately. Gather your tools, such as tweezers, to remove any hair or debris stuck in the vents or motor. For bagless models, such as the Bissell or Dyson, it’s vital to keep the canister clean for fresher air circulation.
When it comes to reassembling your vacuum, do so carefully. Align all parts properly and ensure that the canister clicks into place. If you’re using microfiber bags or non-washable parts, check these regularly to keep your vacuum operating smoothly. Storing your vacuum in a clean, dry area, away from moisture, will also help maintain its quality. For example, you might find personalised cleaning kits that cater to your specific model, like those from Mary Macdonald on Amazon, which can help keep your vacuum in top shape.
By taking these simple steps, you will not only enjoy a cleaner home but also extend the life of your vacuum. With the right care and regular cleaning, your carpet cleaning machine will perform effectively for hours, ensuring a healthier living space for you and your family.
Finding the Filter Location
When it comes to maintaining your vacuum cleaner, finding the filter location is crucial. Most vacuums have a main filter located near the intake area, which is where dust and debris are pulled in. To locate it, you might have to walk around your vacuum and check different panels. If you need to remove the filter for cleaning or replacing, consult your user manual for specific guidelines.

Typically, filters can be classified into two types: non-washable and rinseable. Non-washable filters need to be replaced; using the best practices for maintenance ensures your vacuum continues to work efficiently. Rinseable filters, on the other hand, can be cleaned with damp water to remove excess dust and mold. Be sure to remove them carefully to avoid tearing or damaging the material.
While checking the filter, take a moment to inspect the hose and pleat areas where dust can accumulate. Proper maintenance of these components is essential for optimal vacuum performance. If you notice a build-up of dirt, it’s advisable to give them a thorough cleaning. Look for specialized cleaning tools that can help you reach these areas easily.
In addition to the main filter, some vacuums have secondary filters inside the dust canister or bag. These filters can often be found among the trash collected during vacuuming. It’s best to check these regularly for effective cleaning. You’ll need to replace or clean them based on the type and frequency of usage.
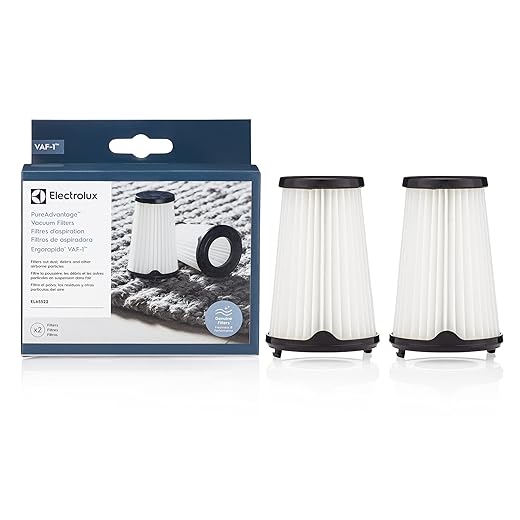
For added convenience, consider browsing Amazon to find quality replacement filters, such as the Dyson HEPA Filter or the Shark Vacuum Filter. These options ensure that you can maintain a healthier environment in your home. Following these step-by-step advice pieces will have your vacuum running like new in no time!
How to Remove the Filter?
Removing the filter from your vacuum is a simple yet important part of maintenance that can significantly prolong the life of your machine. Clear the vacuum to avoid dirt and bacteria from building up inside. Here’s what you need to know about removing the filter effectively, particularly for models like Electrolux.
First, make sure your vacuum is completely turned off and unplugged. Leaving it plugged in is a sign of negligence that can lead to accidents. Depending on your model, you might see a visible button or latch that needs to be pressed to access the filter. Always consult your guide for specific instructions, as different vacuums may require different approaches.
Once you locate the filter, you might need to twist or pull it out gently. Avoid pulling too hard, as the filter can become stuck from debris. If you notice it is particularly dirty, it might be due to a clog or full debris container, especially if you have pets. It’s advisable to check the dust bin and empty it regularly–ideally every month–to ensure optimal performance.
After removing the filter, you might see some black drops or particles stuck to it. This is completely normal, but it’s essential to clean it properly to combat any allergies you may have. A simple rinse with water is often sufficient, but some filters can be cleaned with a damp cloth. Just remember to let it dry completely before reinstalling it. Don’t leave it damp, as this can foster bacteria growth.
When it’s time to reassemble, ensure that you fit the filter back in securely. Properly reinstalling the filter is just as important as removing it. You wouldn’t want any debris to come loose inside your vacuum, affecting its energy efficiency or performance. Follow the pros’ advice, and make this part of your vacuum maintenance routine.
Following these recommendations can help keep your kitchen and other areas clean and fresh, effectively reducing any buildup from dirty trash or debris. By routinely performing these maintenance tasks, you not only prolong the life of your vacuum but also create a healthier living environment. Visit here for high-quality filters that can help you maintain your vacuum’s efficiency.
Q&A:
What are the steps to clean a vacuum filter?
To clean a vacuum filter, follow these steps: First, unplug the vacuum cleaner to ensure safety. Next, locate the filter, which is usually found in the dust container or behind a cover. Remove the filter carefully, avoiding any damage. Depending on the type of filter, you may need to shake off any loose dirt or debris. For washable filters, rinse them under lukewarm water until the water runs clear, avoiding detergents. Let the filter air dry completely before placing it back into the vacuum. Lastly, reassemble your vacuum and perform a quick test to ensure it’s running smoothly.
How often should I clean my vacuum filter?
It is recommended to clean your vacuum filter at least once a month for optimal performance. However, if you use your vacuum frequently or have pets, you may want to check and clean the filter more often. Keeping the filter clean helps maintain suction power and ensures that your vacuum operates efficiently.

Can I wash all types of vacuum filters?
No, not all vacuum filters are washable. It is important to check the manufacturer’s guidelines for your specific vacuum model. Some filters can be rinsed with water, while others are made from materials that should only be shaken out or replaced. Using water on non-washable filters can damage them, so always confirm before cleaning.
What tools do I need to clean my vacuum filter?
The tools required to clean a vacuum filter are minimal. You may need a soft brush or cloth to remove dust, as well as a sink or bowl for rinsing if you are cleaning a washable filter. It’s also good to have a vacuum with a detachable filter and your manufacturer’s manual on hand for reference. No specialized tools are necessary for this task.
What signs indicate that my vacuum filter needs cleaning?
Signs that your vacuum filter needs cleaning include a noticeable decrease in suction power, an increase in dust release back into the air, or unusual noises coming from your vacuum. You may also observe a clogged filter visually, or if the vacuum seems to be working harder than usual. Regular checks can help prevent performance issues caused by a dirty filter.


Trouble shooting fitment. If you are having trouble getting the hepa to click into place you don’t have the carbon filter seated properly. When installing the carbon filter hook one side in first and then slightly flex the carbon filter open so the hooks can slip in and grab the slots. If you keep pressing the carbon filter straight on repeatedly you will bend the hooks in making each successive attempt even more difficult. Flex it open a little. They will hook right in and then your hepa filter will snap right into place with ease. I have also read that people say their dyson won’t recognize the carbon filter. When you go into the setting to reset your filters you have to reset them separately. The first reset I’d do the hepa. Scroll down after resetting the hepa and reset the carbon. This product is a fantastic value. Others with short life spans may have the filter installed incorrectly of the air is just not as clean at this time of year. I have noticed no difference in the dyson filter vs. these filters.
Not for a large 10 gallon shop vac. I am so upset, I put in the type of shop vac I have & the model number to make sure it would fit, but it is the wrong size😡 Now I have to return the product!
didn’t last. didn’t last
Not true to their size guide. Didn’t fit my Shop Vac. To small.
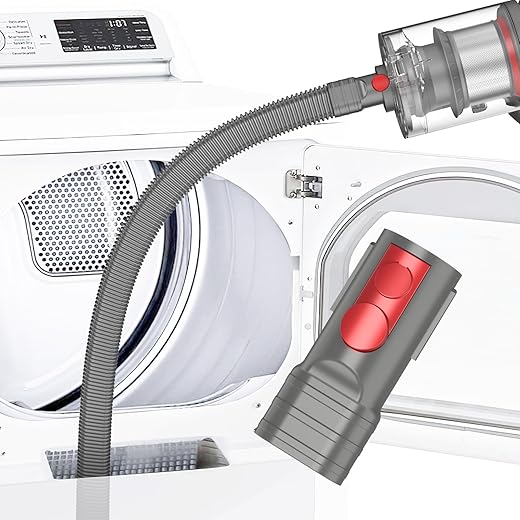
Great Product. This product helped remove all the lint from my dryer. It really got into the crevices of my dryer vent. The vacuum and brush were the perfect size which made it easy to maneuver to really get in there. The brush works very well. The brush is not flimsy and stiff enough to remove stuck-on lint. The is a good value for this vent cleaner set and is worth getting in my opinion.
Great find. Worked great and much less expensive than Home Depot
Very good filters. Fits perfectly. Each filter wrapped in heavy duty plastic. Will order again when the time comes. ✅
Does the job. Sturdy,. Couldn’t tell from pics or descriptions but it does swivel. Does the job.
Cheapest one does the same job all the other more expensive ones do. Gets the job done, simple as that. Picked up stuff from down under that I couldn’t even see existed. Idk why dryer manufacturers make labyrinth style vent systems, but this little kit helped clean what I suppose is most of what was hidden in crevices I cant see unless I disassemble the dryer frame. And guess what, cheaper than all those other ones on Amazon that cost 2-3x as much. Get this one, you’ll be glad you did.
Works great! Real Life Saver. I recently discovered how clogged my clothes dryer was with lint. Mt dryer has a lint trap in the front at the bottom of the door. The dryer was taking way too long to dry things and the “check vent’ light was always on. After investigating, I could see massive amounts on lint way at the bottom below the lint trap but the slot is very narrow. My regular vacuum couldn’t go deep enough to get at the piles of lint. I saw this item and knew it was the ticket. The slender attachment fits down in the recesses and allowed me to suck out two grocery bags of lint. A miricale that the dryer didn’t catch on fire before now. My dryer works great now and actually dries clothes again in one cycle. A similar item in Lowes and Home Depot was $40-$60 while this one is under $10. Same thing. You need this for your dryer.
I love the hooks. Cleaning Stevie (my Roborock QV35) got a whole lot less yucky when I got this set. I especially like the little hooks for lifting out the roller and grabbing the pet hair to pull it out. I hardly have to touch anything. I can use one of these tools to get into the crevices of my Instant Pot rim, too. Quite helpful!
It works like a Dyson filter. Very pleased. This is the second time I’ve purchased the filter.
good for floor vaccum. good quality